Knowing how to write a UX case study is the most critical skill for landing a design job. But staring at a blank page is intimidating.
In this guide, we provide a proven UX case study structure that recruiters love. Whether you are a junior or a senior designer, use this outline to turn your design process into a compelling story.
Writing a case study is hard. This guide gives you the exact formula to follow.
Page content
About UX case studies in general:
Before you get to work, we need to clarify a few important details. Doing so will help you understand the expectations and the purpose of UX case studies:
What is a UX case study?
A UX case study is a linear story that documents your design process. It explains the problem you tried to solve, how you solved it, and the impact of your solution. Unlike a simple gallery of screens, a case study focuses on the logic behind your design decisions.

How are case studies different from UX portfolios?
While a portfolio showcases your work, a case study explains the reasoning and process behind each project. This is essential for UX portfolio case study examples. Back in the day, these used to be printed, book-like documents. Nowadays the industry prefers websites and other digital formats.
How are case studies different from resumes?
Ultimately, you’ll need both to land a job. A resume lists responsibilities, a UX case study shows problem-solving, design decisions, and results in context.
How many case studies should be in a portfolio?
If you’re a junior UX designer, you should include 2-3 case studies in your portfolio. These could describe UX bootcamp assignments, re-design concepts, UX challenges, internship projects, or even fictional products. If you’re a medior or senior UX designer, include 4-5 of your most impressive projects. Your goal should be to feature as many of your skills as possible. And remember: quality over quantity.
What to feature in your UX case studies?
Since your career depends on your UX portfolio, there’s a lot of pressure that comes with putting one together. Usually, it’s this pressure that numbs designers and leads to procrastination. But just setting straight what lays ahead will help ease your mind:
- The story of your design
- Design decisions
- Visuals with explanations
User persona and the story of your design
Clearly define the challenge and your target users. Include user personas, research insights, and context to make your story compelling. For every design, there was at least one problem that required a solution.
You were the person who explored the problem and found the solution/solutions. There might have been moments when the whole thing went off-rails, or when you needed to go back to the drawing board to iterate. Those are all part of your design story.
Now, imagine that a friend, peer, or colleague asks you about a project. How would you talk about it? That’s almost exactly what you should put in your case studies. Just polish it a bit, leave out the curse words, add visuals and you have a case study.
Design decisions
Throughout the design process, you keep making decisions. Choosing a UX method to apply or choosing one solution over another are decisions too, and you had reasons for your choices. Your UX case studies need to highlight these decisions and their contribution to the design and the outcome.
The biggest mistake in UX case studies is when UXers go on defining instead of explaining:
- Definition ➡️ “I proceeded to do an in-depth competitive analysis to find out more about competing apps in the same category.”
- Explanation ➡️ “I proceeded to do an in-depth competitive analysis to make a list of features that were missing from our products to check out how others solved the XY flow and find out how could we improve it in our procut.”
Then you’ll move on to explain what you’ve found and as your case study progresses, you reference those findings.
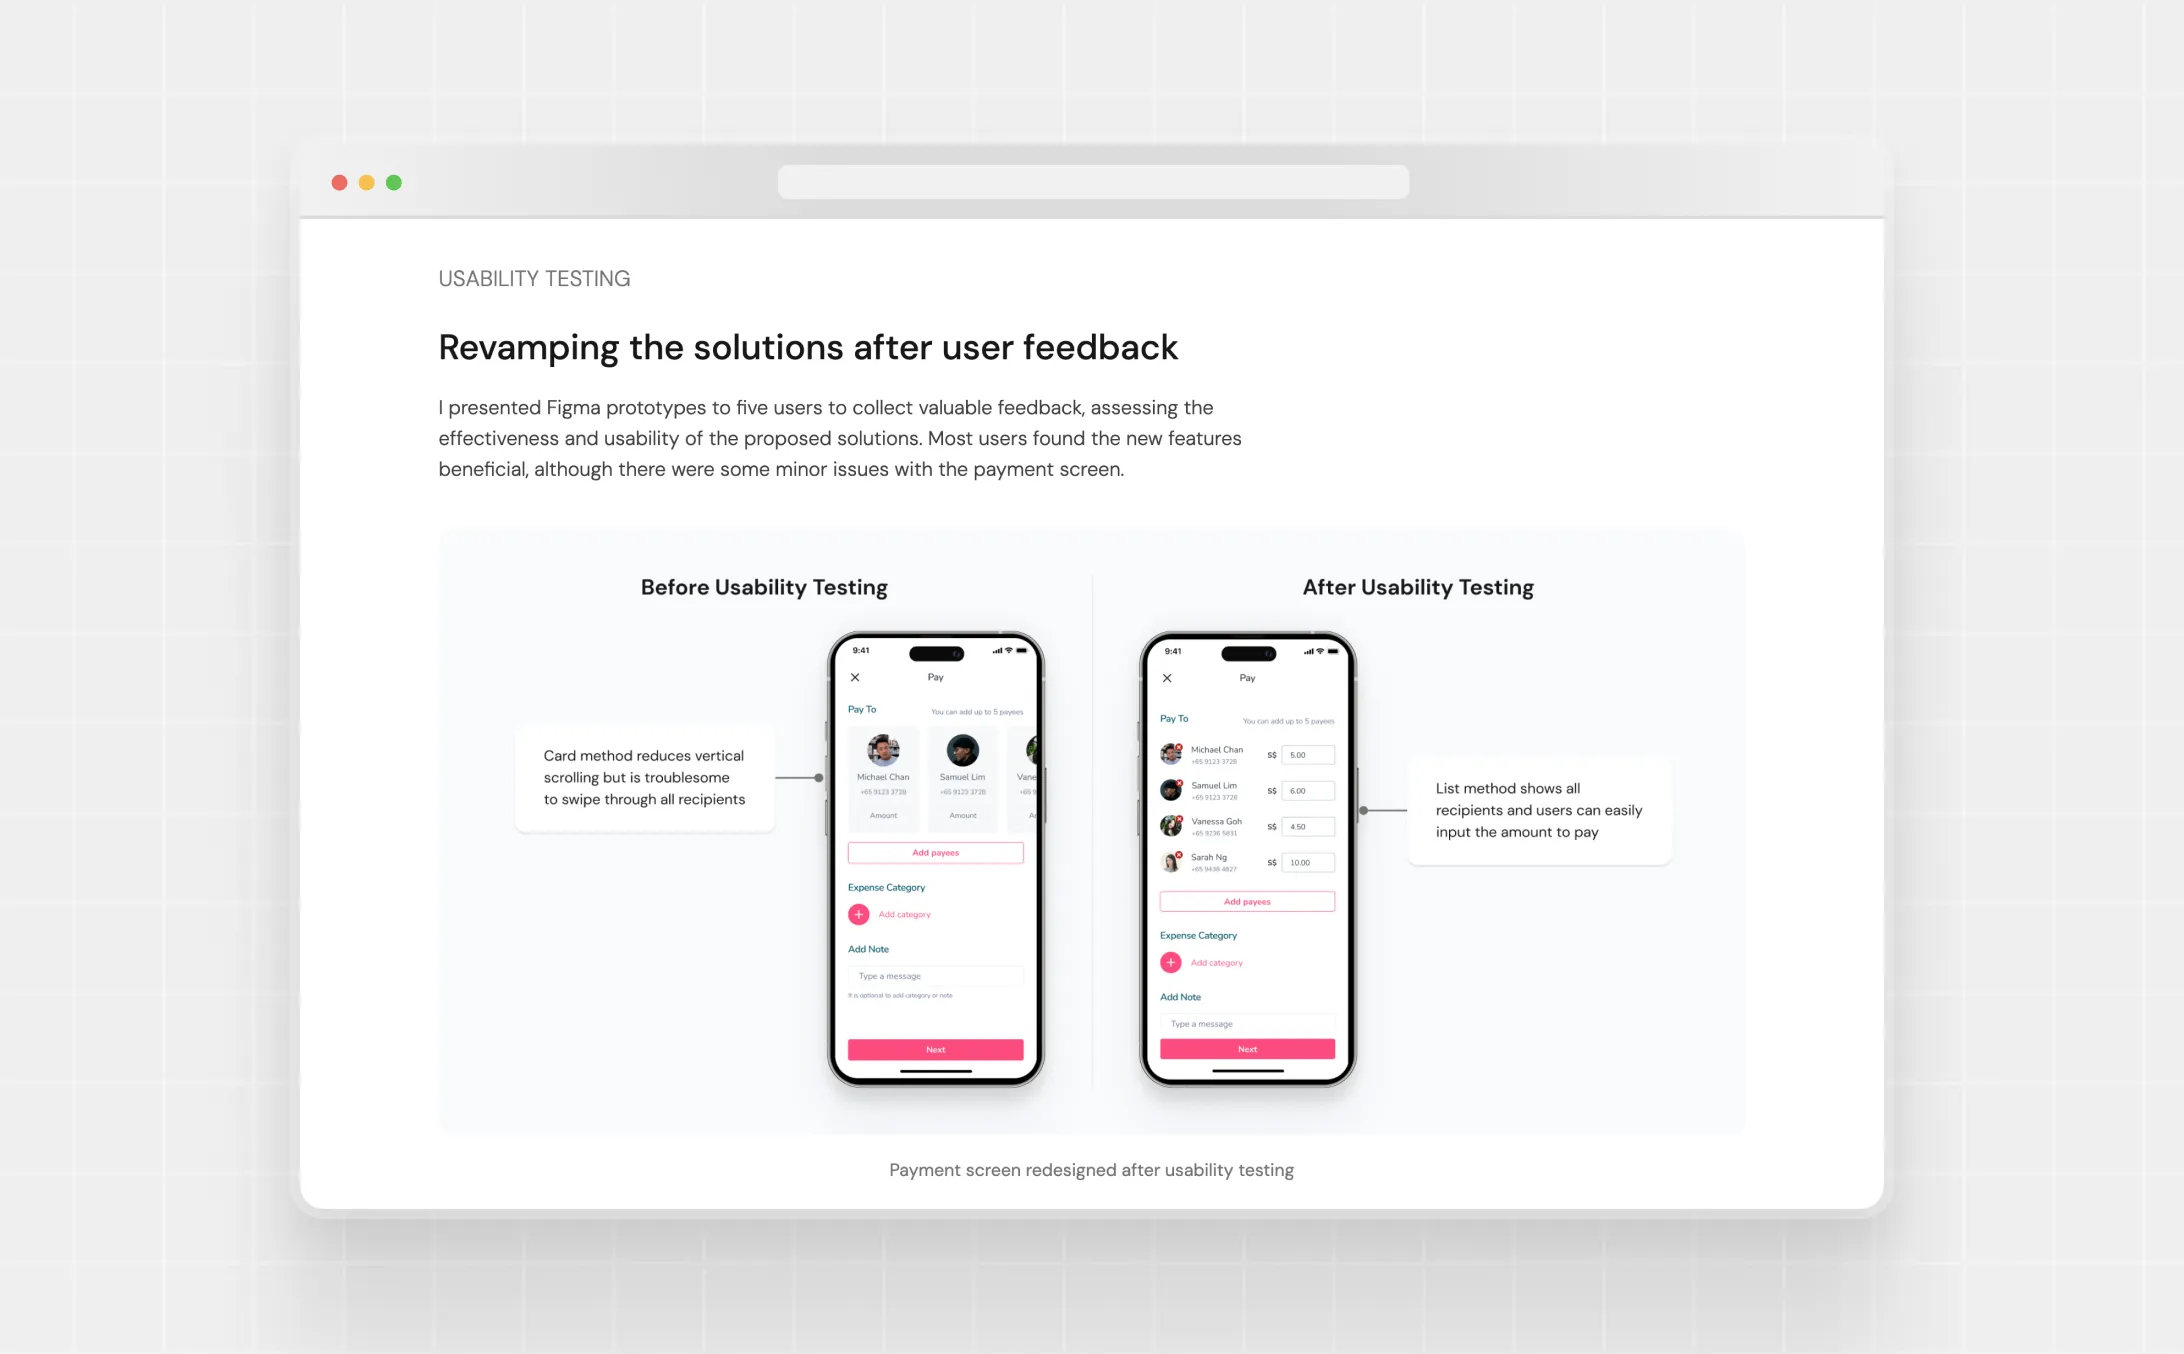
Visuals, wireframes and usability testing results
Add wireframes, mockups, and usability testing results to make your process transparent. This shows how your designs evolved and the reasoning behind final decisions. You need to be heavy-handed with your visuals when you’re creating UX case studies. Using images alongside your text will help your readers’ comprehension. So, as a first step, collect everything you can: photos, sketches, whiteboard grabs, graphs, personas, screenshots, wireframes, user flows, prototypes, mood boards, notes, and so on.
We’ve seen some creative UXers use screenshots of calls (with blurred-out faces), group photos, and prototypes of all fidelity. Such visuals help us understand what we’re reading about. But they also build an image in our heads of the designer behind the portfolio, which can be very powerful and memorable.
Some designers are already in the habit of keeping every scrap of paper with a scribble on it because they know that when it comes to writing a case study, you can’t have enough visuals. Follow their example to make your easier. Your future self will thank you.
But it’s not enough to just throw some images into a case study. Here’s how you can make them impactful:
- Always give context ➡️ if you include that stunning photo of the wall with post-its into your case study, make sure that you place it in a section where you explain what’s happening on it (see design decisions) or give it a caption that explains it. The important thing is that visuals will only work if they are strategically placed or they come with an explanation.
- Strive for visual consistency ➡️ even if it requires some extra work, you should make sure that your visuals match each other. Yes, a persona and the user flow might not be close to each other on your layout, but they’re still in the same document so they need to have consistent styling. Believe me, this is a common criticism from design leads and HR folk as well.
How long should be a case study?
If you check a site like Behance, you’ll find that most UX projects there are rather short. Usually, they focus on the visual aspects of design, aka UI. That is a fantastic starting point for a case study. But for UX design, you will need to add some content for context.
The good news is that you don’t need to write essays for case studies. All it takes is around 600 words and some well-optimized visuals. You should never stretch your words because it’ll reflect poorly on your presentation skills. Keep it concise and straightforward.
Also, treat this number with flexibility: If the project at hand justifies it, feel free to go above or below that. Usually, when a case study is very long, it’s because the project itself was more complicated, and that’s perfectly understandable.
What’s the point of UX case studies?
1. Applied designer skills
It’s one thing to learn a skill and it’s another to use it in a way that can help drive numbers for a business. A great UX case study will prove that you are capable of applying your skills and delivering a solution even with all the distractions and obstacles that come with real-life scenarios.
2. Presentation skills
Many UXers forget about the skills that are required of them beyond UX. Just read a few UX designer job descriptions, and you’ll find that advocating for design best practices is one of the most common requirements.
As a designer, you’ll have many design meetings and reviews and you’ll need to create presentations to present your own or your team’s ideas. And the fate of those ideas might depend on the way you present them. Therefore, the way you articulate your thoughts is important. A great UX case study will show that you are great at structuring your thoughts and articulating complex concepts.
3. The impact of your design
You can see in our UX case study template that there’s a separate section for showcasing your impact. If you can prove that your design can drive numbers or positive change, you’re set. This is the single most powerful tool that you can use in a case study: before-and-after analytics, such as an increase in checkouts, increase in finished flows, better CTRs, user feedback, etc. If you don’t have the numbers, just use before-and-after images with explanations of the changes.
4. Navigating in a team
Almost every product is a collaborative effort between professionals from various disciplines: researchers, designers, developers, marketers, etc. Therefore, navigating in a collaborative environment is an important trait. A case study should show how the team influenced the design, how you’ve collaborated with other designers, the sacrifices that had to be made, and so on.
5. Showcase of your taste
Yes, it’s UX, but the reality is that most people don’t care: if what you present doesn’t appeal to them, it’s unlikely that you’ll get the job. Make sure that your UX case studies are visually consistent. If you want to cast a wider net, strive for sleek, minimalist solutions and harmonizing colors.

A simple yet effective UX case study template
This is a tried-and-true UX case study template that can provide a structure to your thoughts. There are 6 chapters that are standard for almost any UX case study. However, the content of these chapters is highly dependent on the project you’re writing about. But don’t worry, this doesn’t mean that we’ll leave you on your own: for each chapter, we’ll give you various options and ideas to help you get going.
UX case study template/skeleton:
- Hero section
- Project overview
- Exploration/Discovery
- UX design process
- Final design
- Impact
- Learnings
1. Hero section
All case studies should begin with a title & subtitle. You can use various formulas for your title, but we’ve found that this is the one that works the best:
- Impact + project scope + product name = Increasing conversions through redesigning Netflix’s checkout flow
Your subtitle can provide a glimpse into the project, for which you have various options:
- What’s the product about? (An app that helps you keep your plants alive.)
- What was the project about? (6-week UX design and research project)
If you want to include something visual in your hero section go hard or go home: use spoilers, aka show screens of the final design. You don’t have to fit everything there, just the parts you’re most proud of as an appetizer. Later in the case study, you’ll have enough space to showcase everything you’ve worked on.
📃 Length:
- 2 sentences (titles), and
- 1 optional cover image.
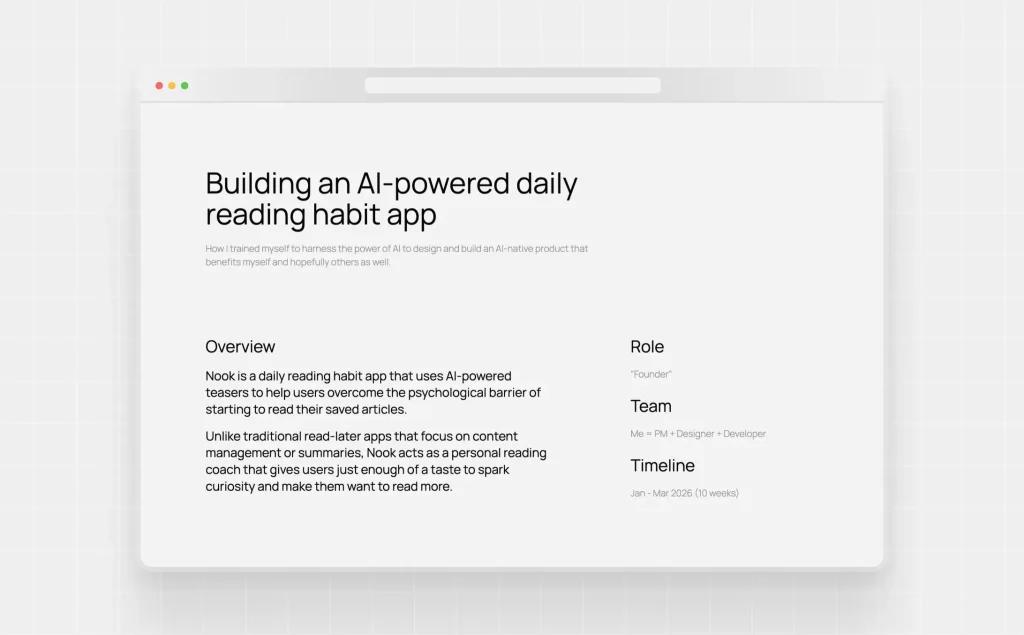
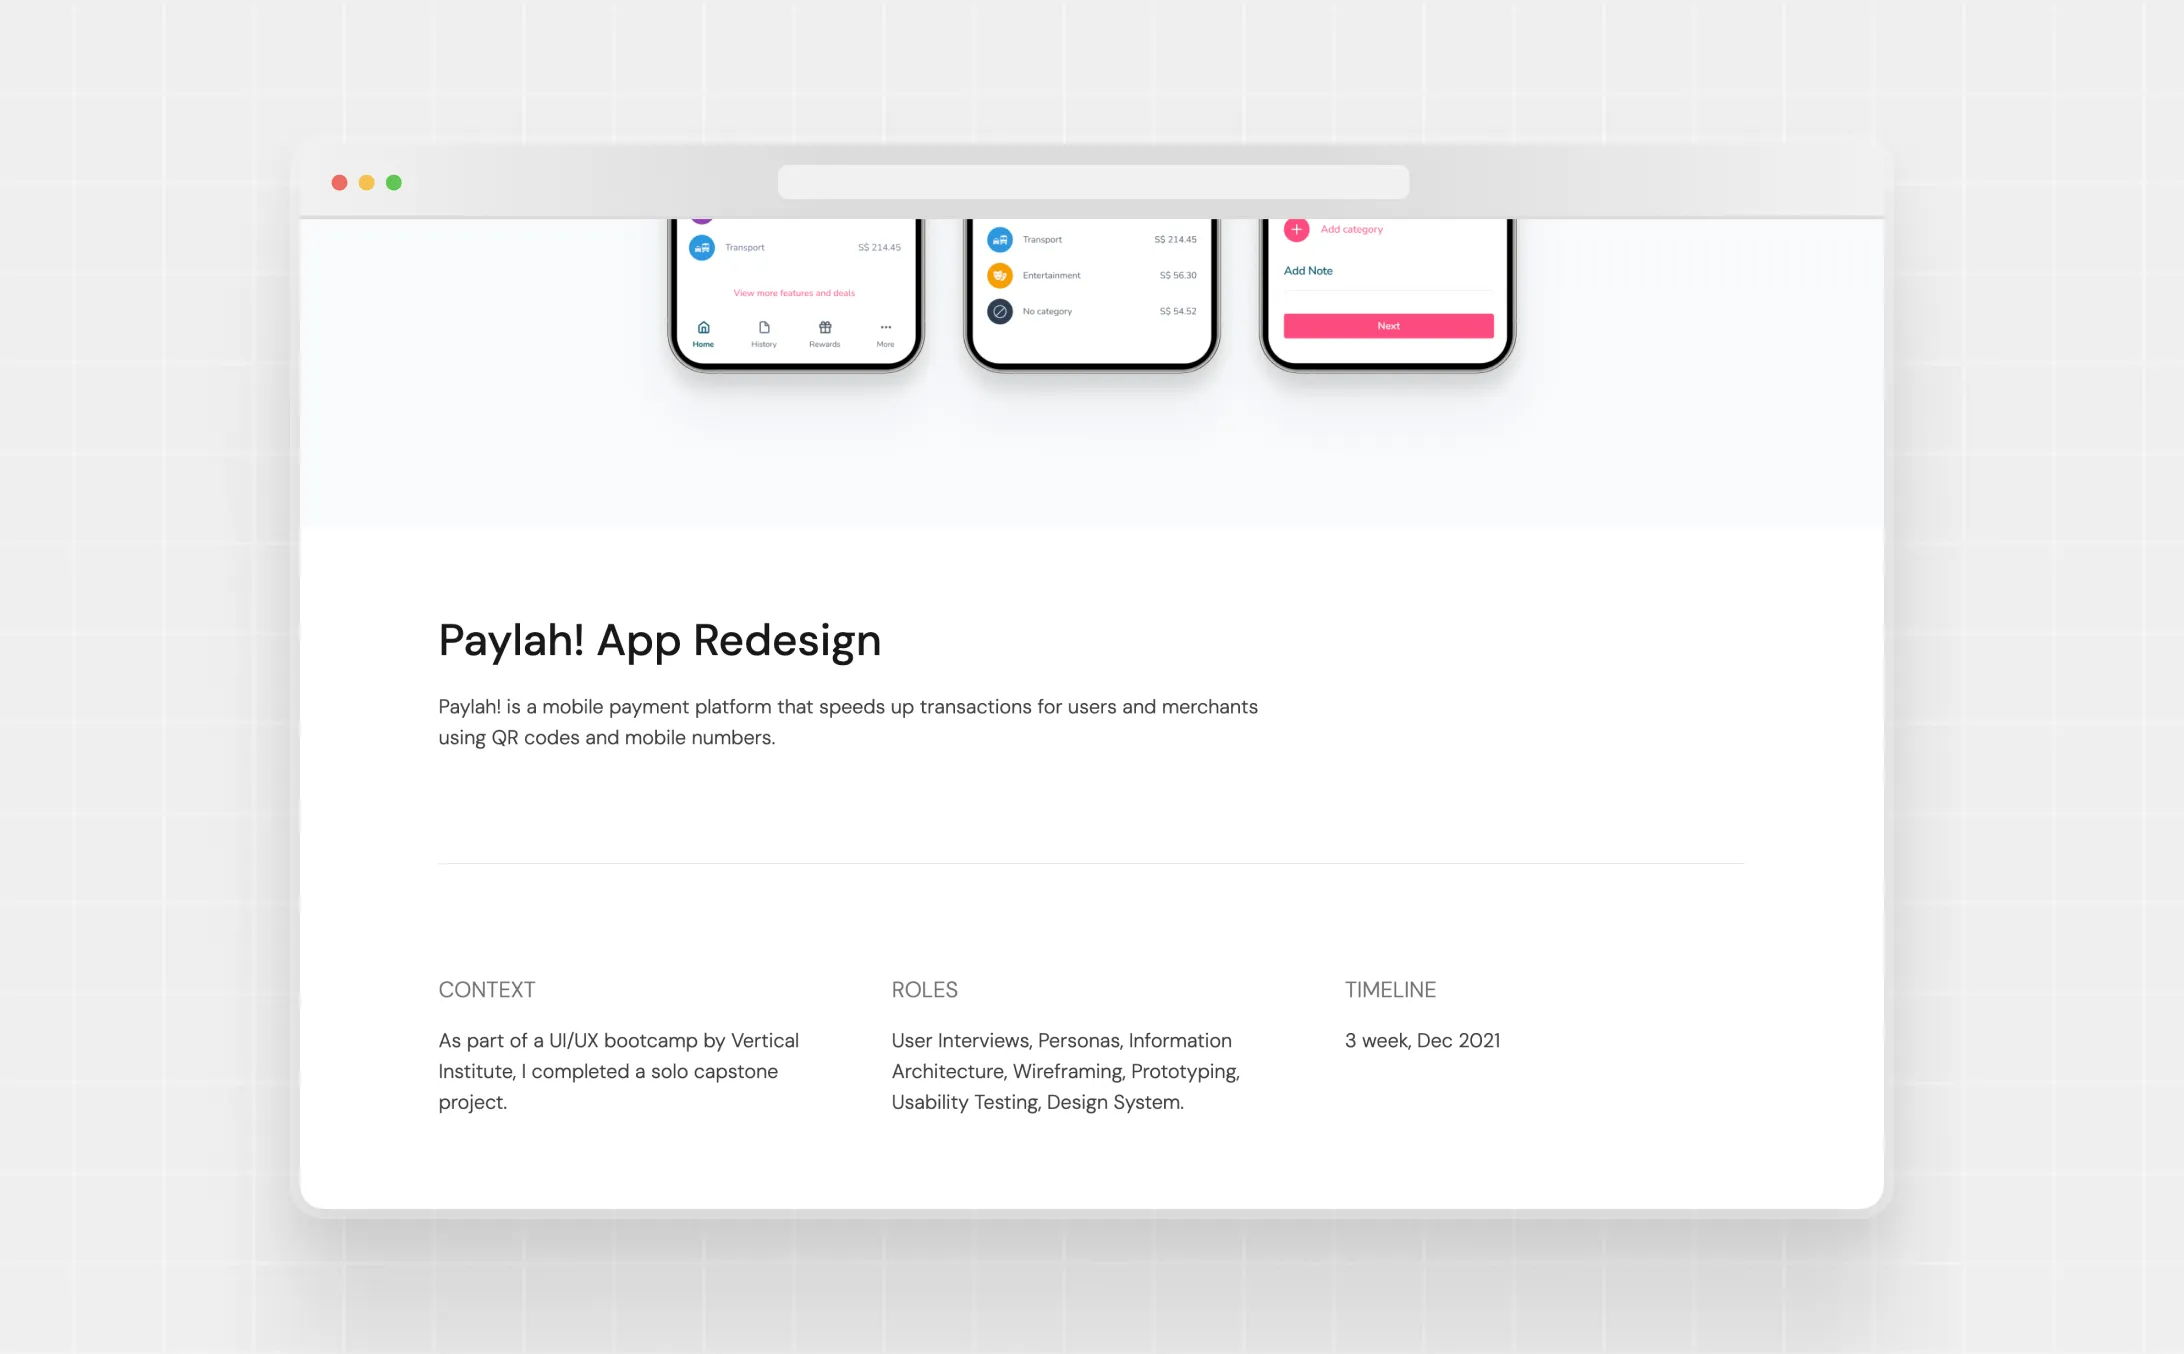
2. Project overview
Make sure that your readers are prepared for what’s to come. Remember: they know nothing about this project, so you need to cover the bases:
- Product description,
- Your role,
- Tools,
- Team members,
- Project length,
- Methods used, and
- Problem.
📃 Length:
- 3-4 sentences for the overview, and
- 4-5 bulletpoints for the small details.
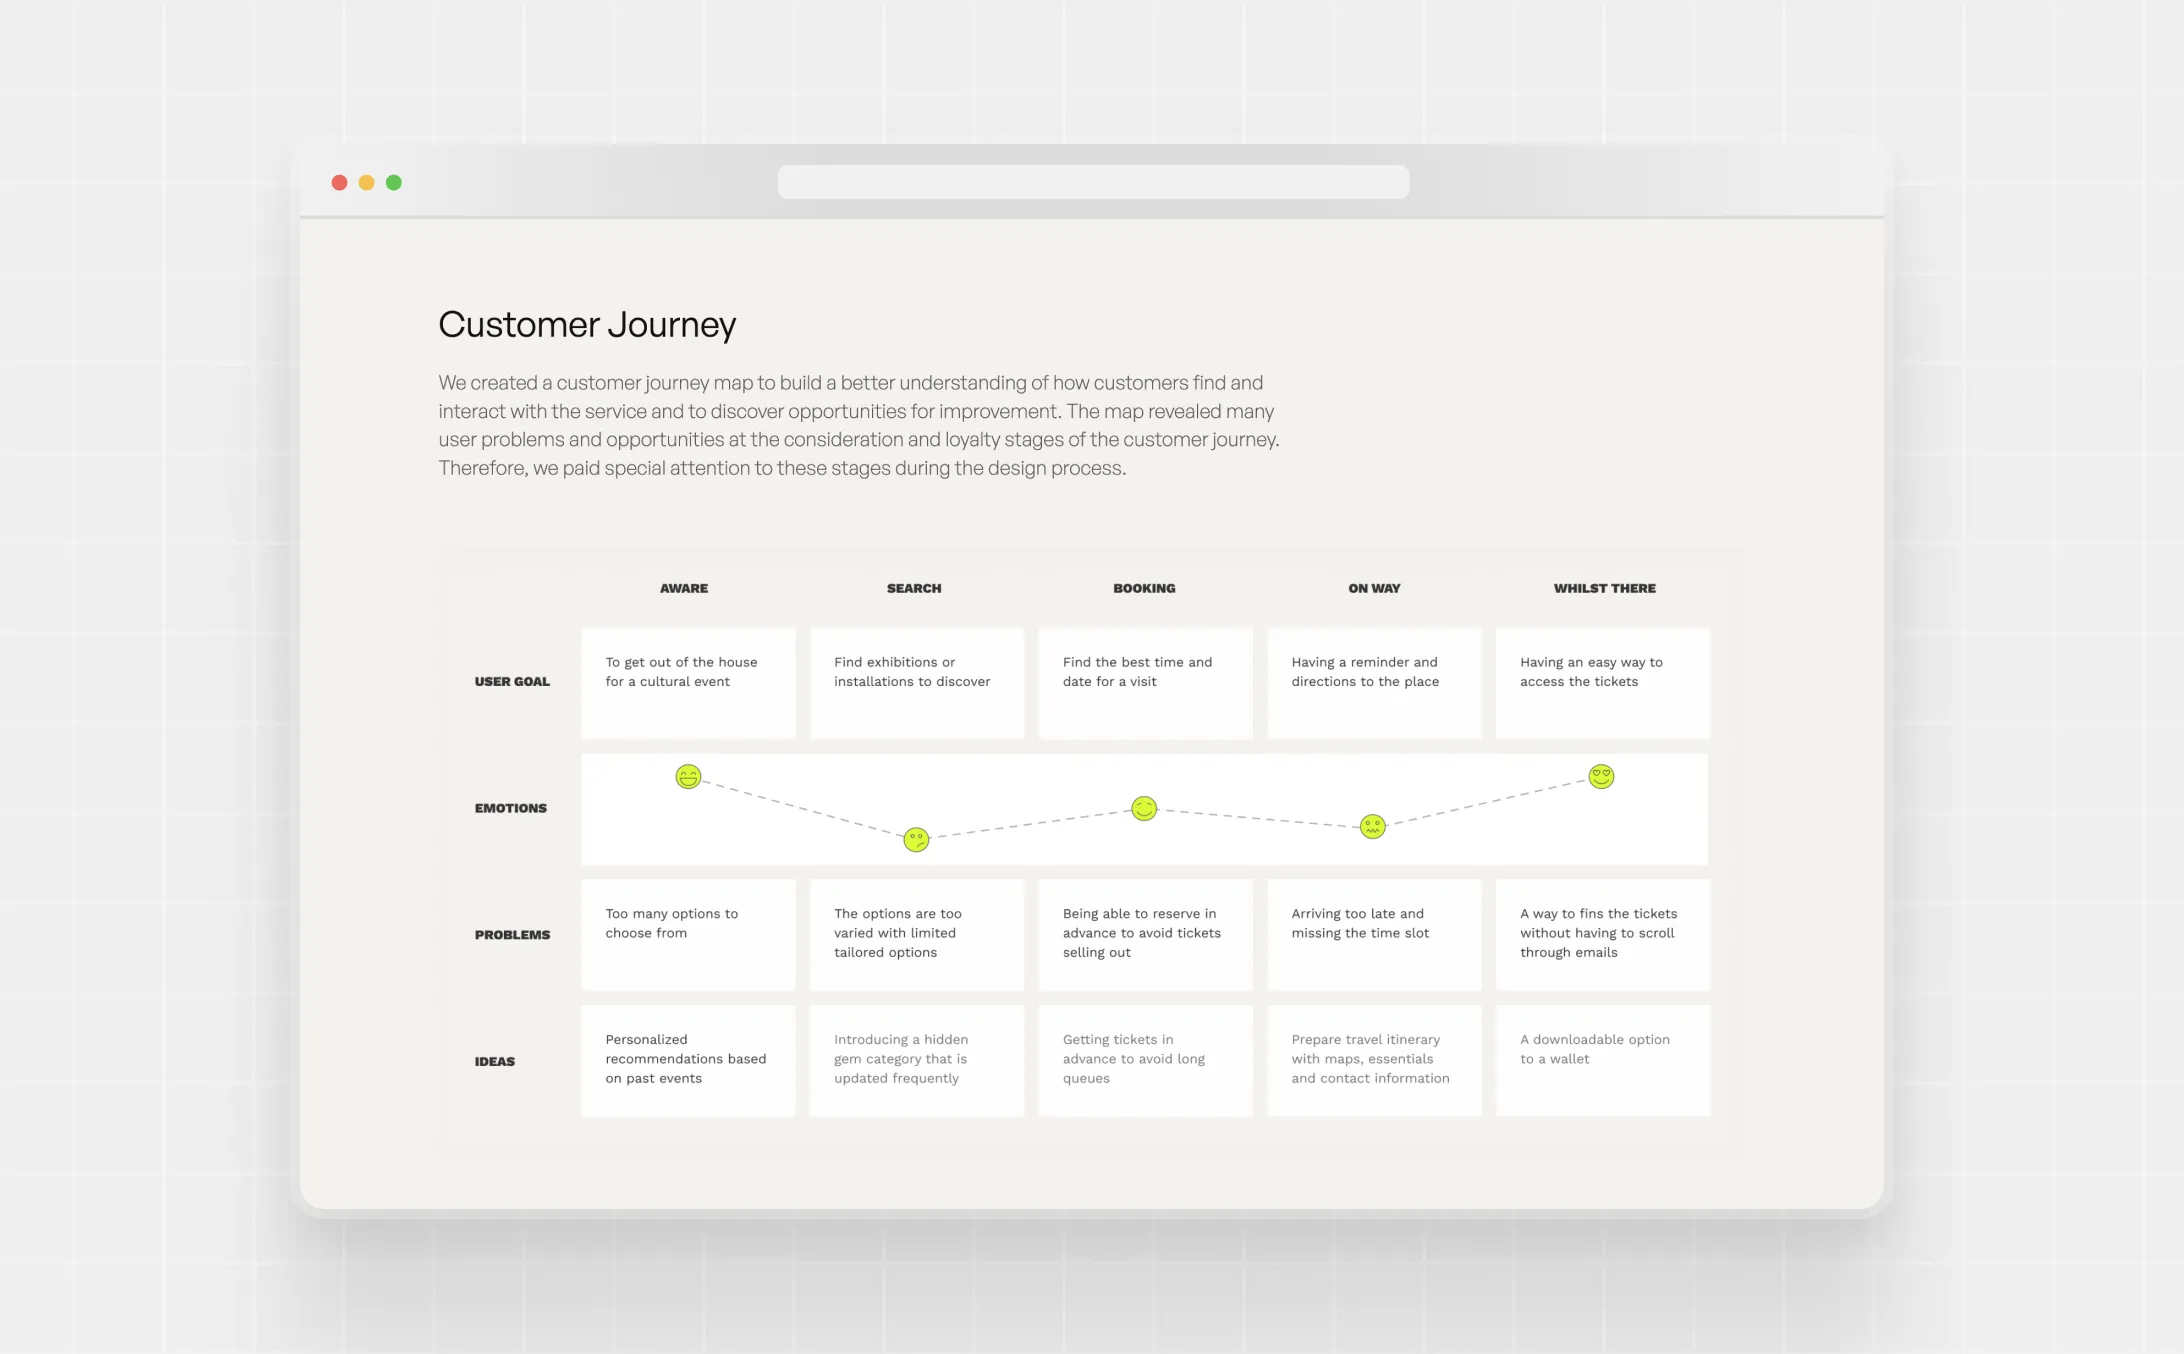
3. Exploration/discovery
Now that we have all the background information, we can move on to how you’ve approached the issue you were presented with. This part usually includes:
- Workshops,
- Competitive analysis,
- Personas,
- UX audit,
- Surveys,
- Interviews, and
- Sketches.
Make sure that for everything you mention you answer at least these three questions:
- Why did you choose to do it?
- What did you find out?
- How did that influence your next move?
You can end this chapter with a wrap-up to create a smooth transition to the next chapter.
📃 Length:
- At least 3-4 sentences for each method you’ve used,
- Visualize as much information as you can.
4. UX design process
Now that we understand the scope of the project, we’re eager to see how you went on to design a solution. You can achieve a great structure here if you start from more abstract ideas and move towards the final design:
- Flows,
- Wireframes,
- Prototypes,
- Testing,
- Iteration, and
- Validation.
The most powerful thing you can show is a wireframe that failed user testing, and how you fixed it in the final design. This proves you can solve problems, not just make things pretty.
📃 Length:
- At least 3-5 sentences for every method you mention.
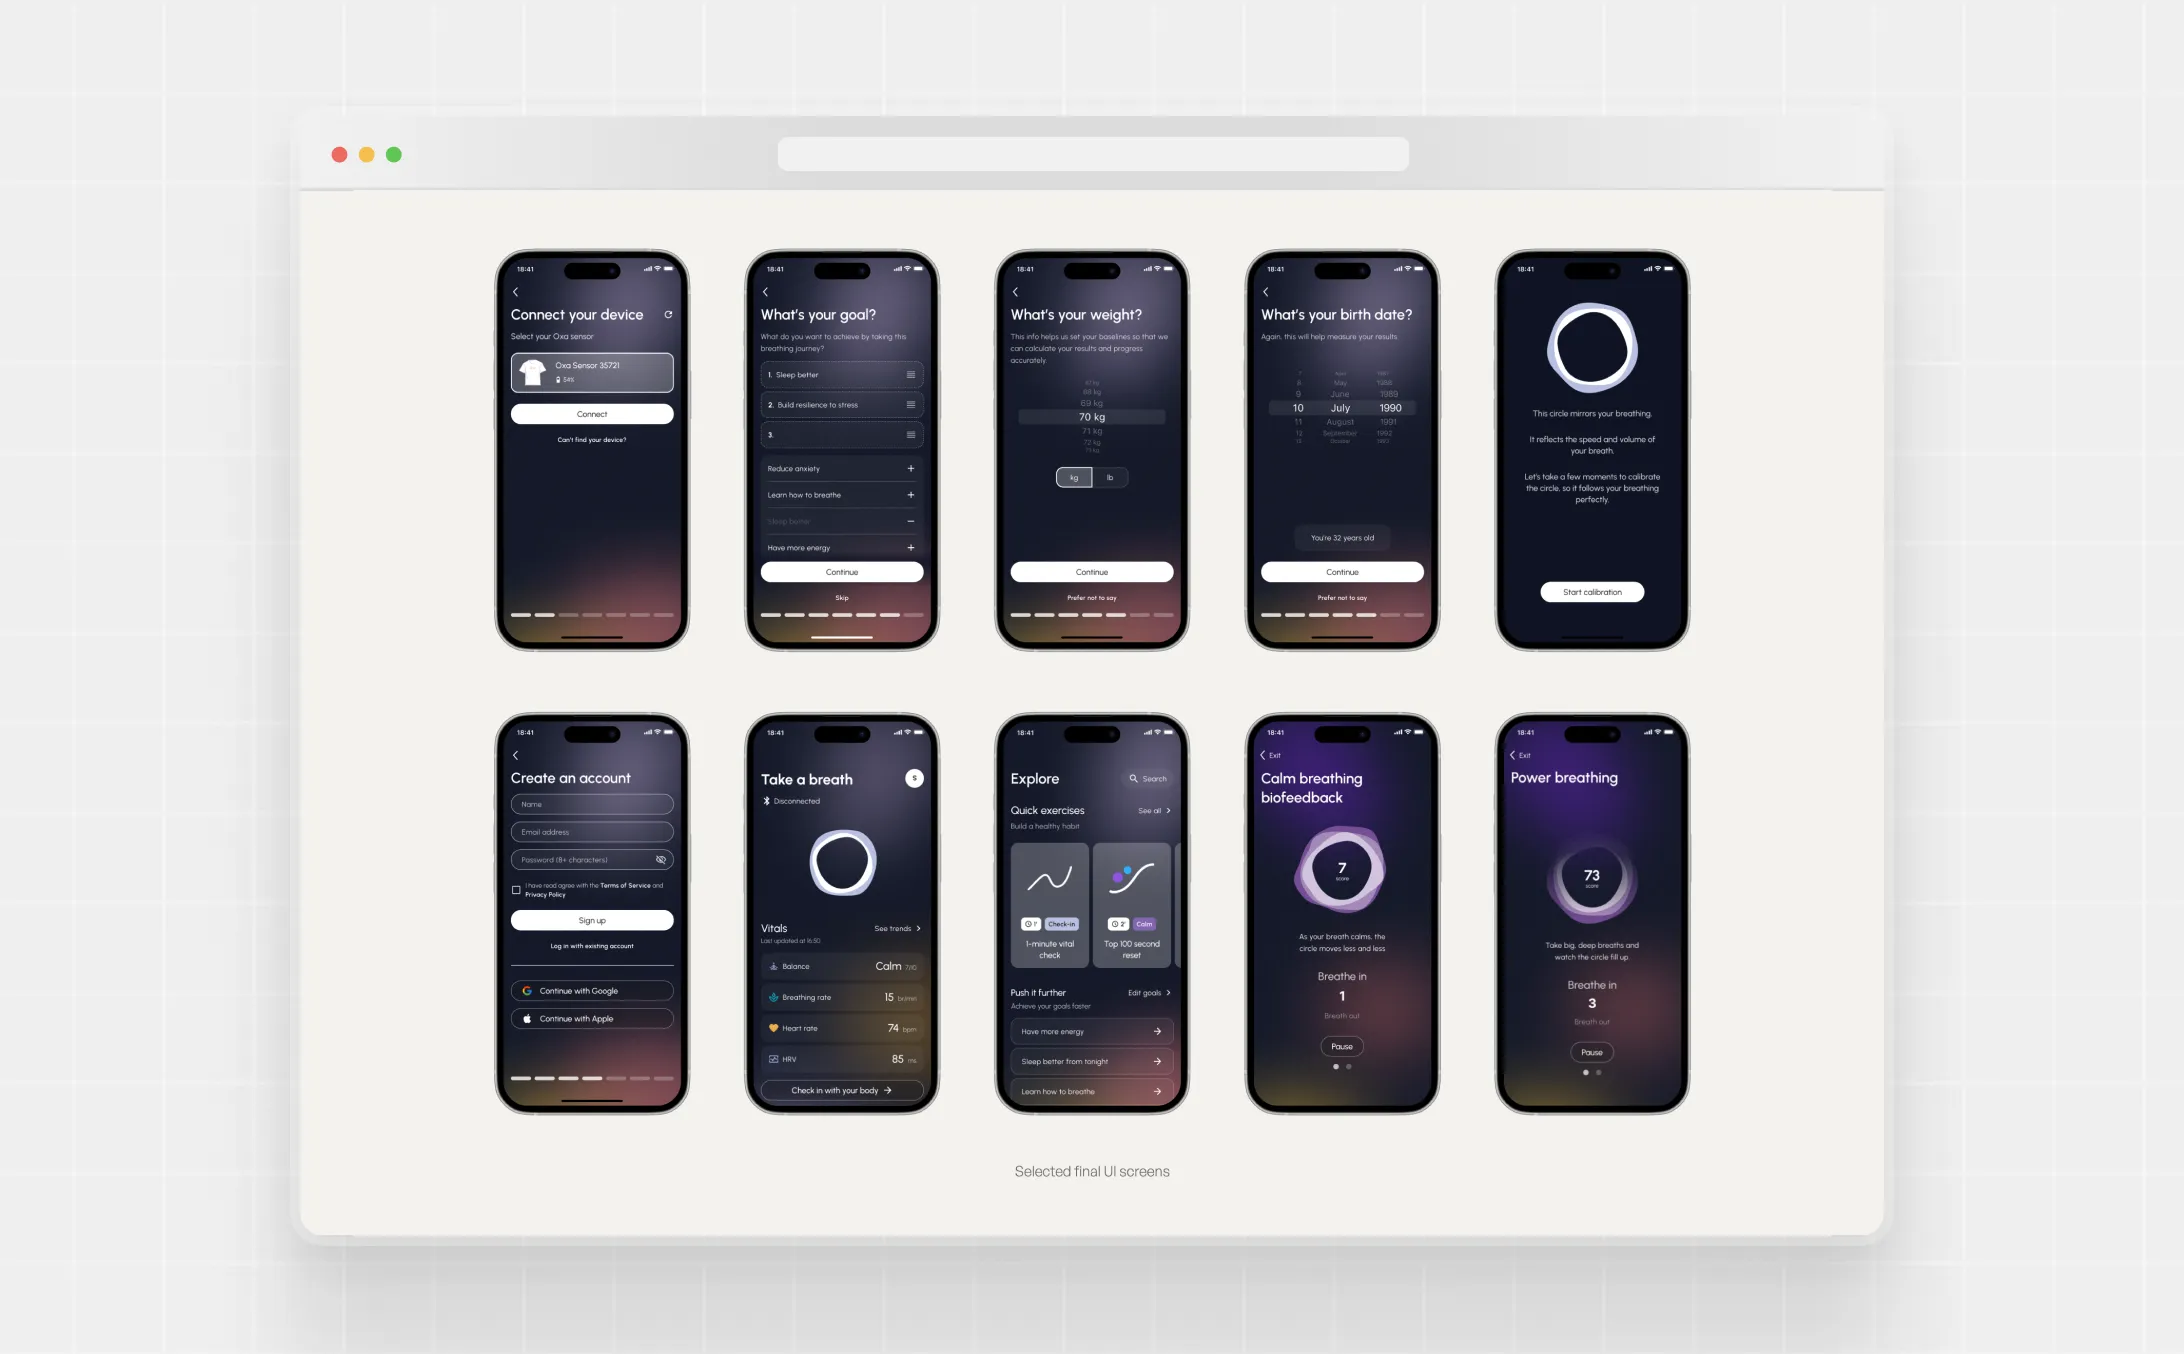
5. Final design
Probably the most exciting part of every UX case study is the reveal of the final design. In this section, you should explain
- Why did you choose this solution?
- What other solutions were in the run?
- Before-and-after screenshots (if relevant to the project).
There are two great options to present your final designs. The first is to use galleries. You can go with a nice carousel or a grid that follows a logical order. The second is to embed your Figma prototype. This has the added benefit of making your case study interactive, which makes for a more memorable experience. (Or you can combine the two for an even better showing.)
📃 Length:
- 2-3 short paragraphs.
6. Impact
If you have numbers or analytics that show how your design contributed to business goals, you need to showcase them. This will make your case study even more impactful. You don’t need graphs and piecharts (unless you have the time to create some); it’s enough to make a list with the quantifiable data. If you don’t have access to such data, you can also include testimonials and user quotes to underline impact. If you can include both, that’s a winning combination.
📃 Length:
- At least 1 sentence for each achievement.
- In a bulleted list or short paragraph.
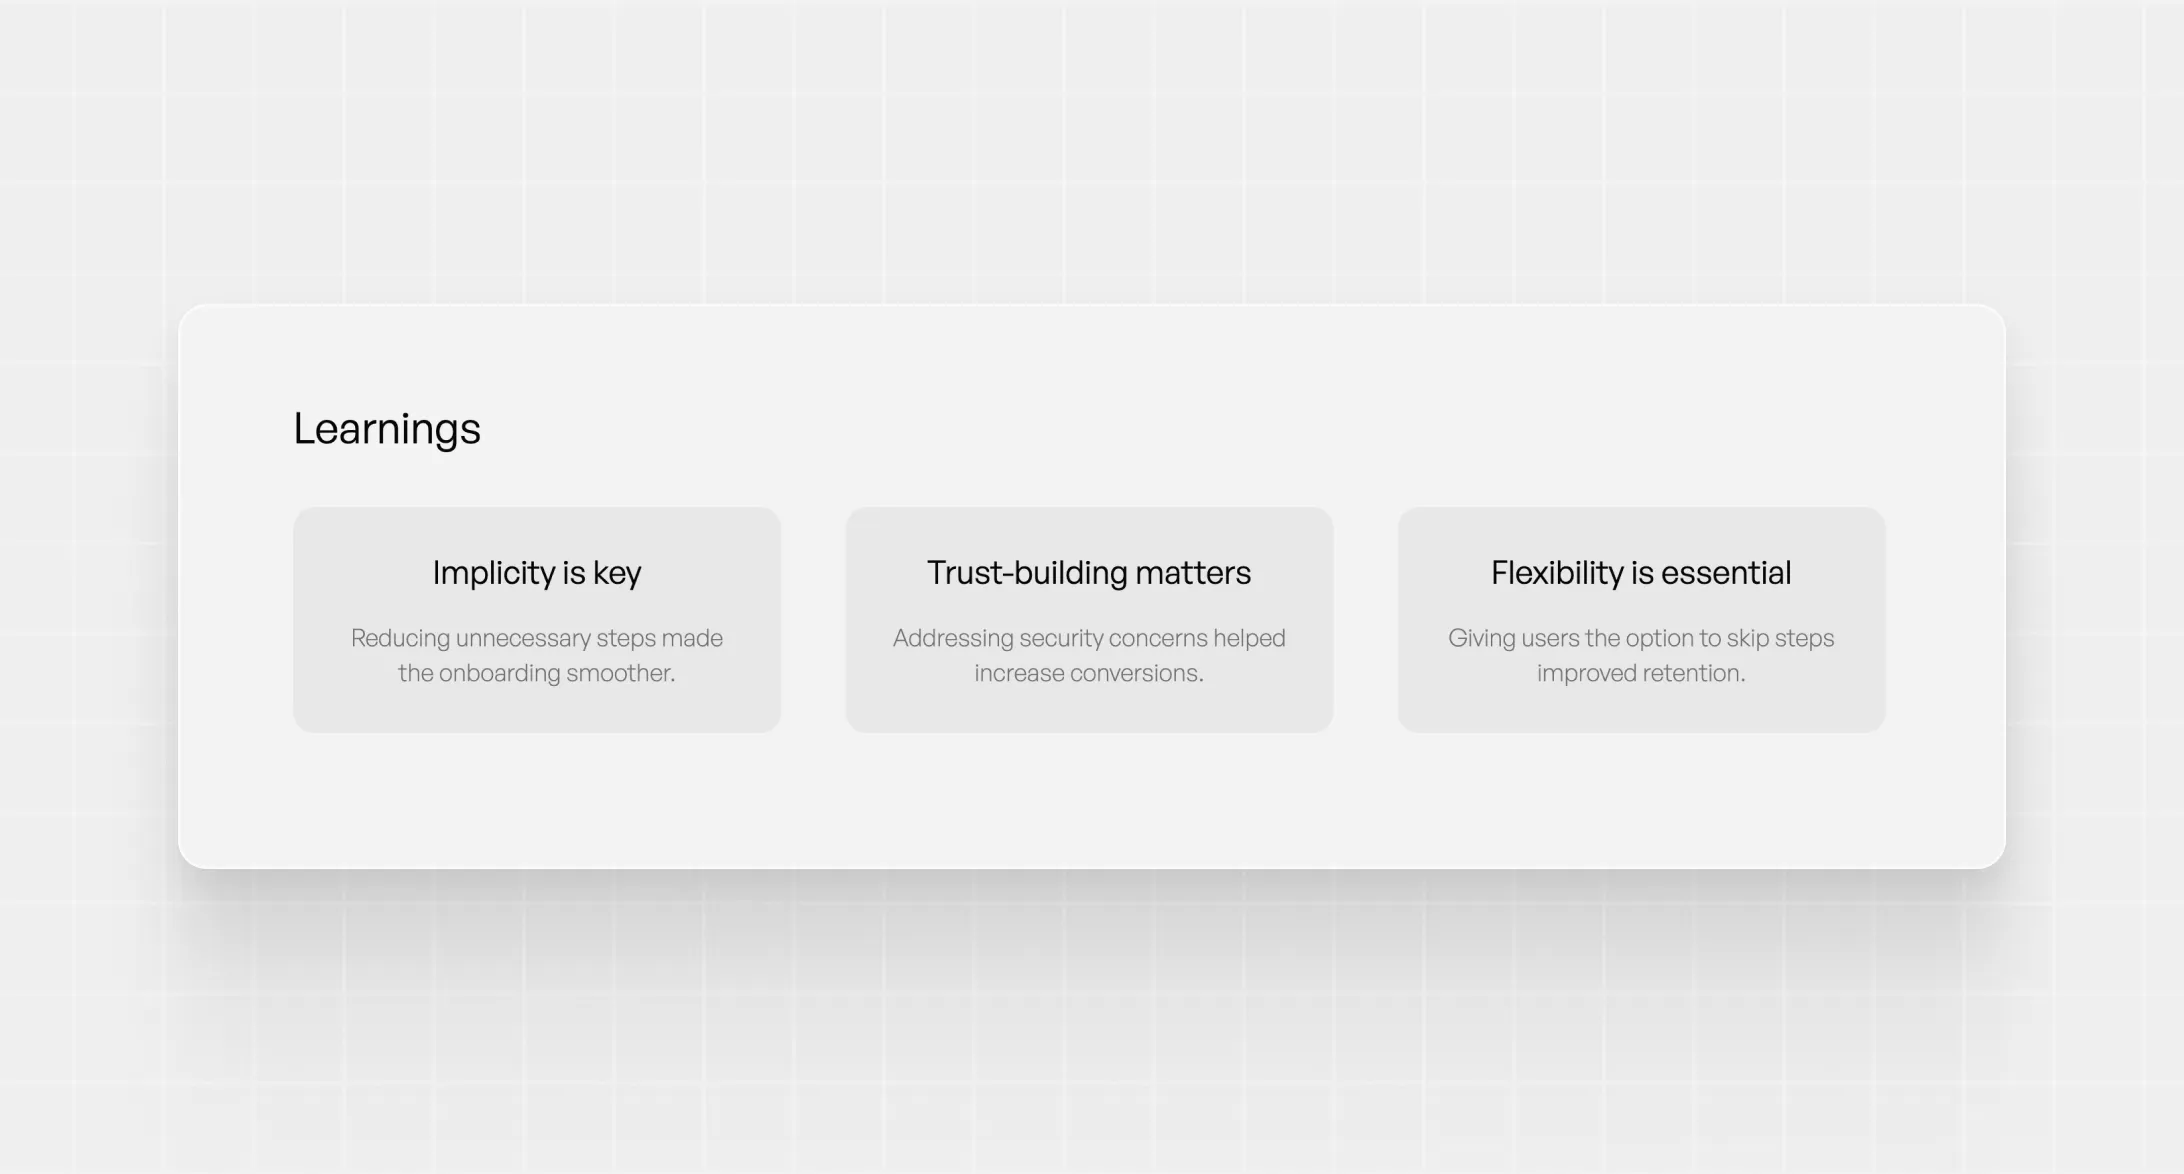
7. Learnings
There’s something to learn even from the most boring project you’ve ever done. At least, you should strive to find something positive that can contribute to your growth as a designer. This can be a soft skill, a new tool, a new method, or a different way of cooperation. Try to think of things that were new to you in this project and share the takeaways with your readers. Alternative closures include:
- Takeaways
- What would I do differently?
- Jobs to be done
📃 Length:
- This chapter can be as long as you please, but
- At least 3-4 sentences.
Alternate UX case study templates
We’ve provided a classic UX case study template that has been proven to be working. Now, we’ll show you how you can alter this template for different flows:
UI focused case study template
If you’re strong in UI, you should not wait to reveal your final design until the end of your case study. You needn’t worry about spoiling the surprise as a case study is not a fiction novel or Netflix show. A beautiful design will pull in your readers. What’s more, if the company doesn’t really know the difference between UI and UX, this approach will make your case study even more impactful as it’ll start with the ‘beautiful stuff’.
Here’s how that template would go:
- Hero
- Project Overview
- Final designs (gallery, interactive prototype)
- Transition to the next section by letting your reader know that you’ll explain how you’ve arrived at this solution.
- Exploration/discovery
- UX design process
- (Optional: Showcase even more of your final designs)
- Impact
- Learnings
Impact driven case study template
Every product has a business behind it. And what you can do for that business is what matters to stakeholders. We can all conclude that a screen is pretty, but if it doesn’t contribute to business goals or KPIs, it’s just that, a pretty screen. So, if you have some numbers to share, don’t be afraid to put them right after your intro section. Then go on and showcase how you’ve achieved it:
- Hero
- Project Overview
- Impact
- Share numbers then follow up by showcasing the design which contributed them:
- Exploration/discovery
- UX design process
- Final design
- Impact
- Learnings
Frequently Asked Questions (FAQ)
What should a UX case study include?
A strong UX case study should tell a clear story – starting with the project context (problem, audience, constraints), then walking through research, design decisions, prototypes and iterations, final solutions, and if possible, measurable results or impact. Always explain why you chose certain approaches, not just what you did.
How long should a UX case study be to stay effective?
Aim for clarity and depth rather than unnecessary length. For many projects, 800 – 1.500 well-structured words combined with relevant visuals (sketches, wireframes, prototypes, screenshots) are absolutely enough.
Can junior designers include speculative or school projects in their portfolio case studies?
Yes, if you treat them seriously: define a clear problem, document your process, justify your decisions and reflect on what you learned. Recruiters and employers value the thinking process and reflection even more than polished UI when assessing junior UX portfolios.
What if I don’t have real user data or analytics to show impact?
That’s fine. Instead of data, you can show annotated before/after screenshots, discuss usability test results (even informal), share user feedback or illustrative scenarios, and explain how design changes addressed key pain points or improved usability. The narrative and rationale are often more important than raw numbers.
How many case studies should I feature in my portfolio as a junior UX designer?
For junior level, 2 – 4 solid case studies are enough. Focus on quality, diversity (different types of problems/projects), and clear process + outcome. Having a few well-presented, thoughtful case studies is better than many shallow or repetitive ones.
Build your UX case studies with UXfolio!
UXfolio is a portfolio and case study builder made with UX designers in mind. It offers stunning, customizable templates as well as a case study generator with text and image ideas. What’s more, UXfolio comes with built-in device mockups, easy prototype embedding, and password protection on the portfolio or the case study level. Ready to work on your portfolio? Try UXfolio for free!
You must be logged in to post a comment.